Your kitchen sink faucet is leaking like a sieve, the water pressure’s weaker than a cup of Earl Grey left out overnight, and you’re staring at it like it’s personally offended you. You’ve Googled “how to remove a kitchen faucet” so many times that your search history looks like a plumbing manual. The problem? Most guides either treat you like a complete novice (with steps so basic they’re insulting) or assume you’ve got a PhD in pipe-wrenching. Here’s the truth: removing a kitchen faucet isn’t rocket science, but it’s not as simple as twisting a few bolts and calling it a day.
You’re in the UK, where DIY culture is booming—42% of Brits tackled at least one home improvement project in 2023 (YouGov), and kitchen upgrades are near the top of the list. But here’s the catch: a botched faucet removal can turn your Saturday morning into a waterlogged nightmare, especially if you’re dealing with corroded pipes, stubborn nuts, or a faucet that’s been glued in place by decades of limescale. Worse? If you’re renting (like 30% of UK households), you might not even own the sink—but that doesn’t mean you’re stuck with a faucet that sounds like a dripping tap in a horror film.
This isn’t another fluffy “how-to” that leaves you Googling “why is my faucet still attached?” at 2 AM. This is the no-BS, step-by-step guide to dismantling your kitchen sink faucet—whether you’re replacing it, fixing a leak, or just curious how the damn thing works. We’ll cover the tools you actually need (no, a butter knife won’t cut it), the common pitfalls that’ll make you want to call a plumber (and how to avoid them), and the three most frustrating scenarios you might face—plus how to beat them. By the end, you’ll know exactly how to take that faucet apart without flooding your kitchen, breaking a pipe, or ending up with a wrench embedded in your palm.
Step 1: Know Your Faucet (Because Not All Are Created Equal)
Before you grab a wrench and start yanking, stop. Your faucet isn’t just a random piece of metal—it’s one of four (or five) main types, and each one has its own quirks. Get this wrong, and you’ll be staring at a sink full of parts wondering, “How the hell do I put this back together?” Here’s how to ID yours:
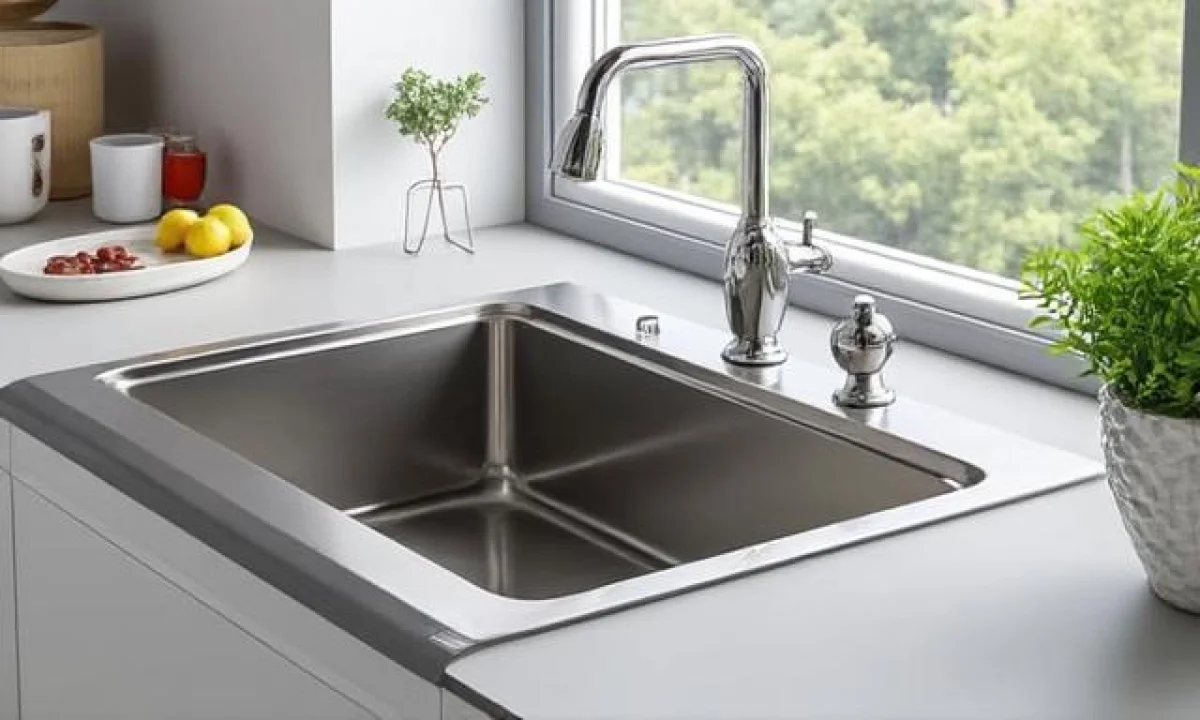
- Single-Handle (Mixer) Faucet: The most common in UK kitchens—one lever controls both hot and cold. Usually has a cartridge inside (the part that wears out and causes leaks). Brands like Mira or Grohe dominate here.
- Double-Handle (Separate Hot/Cold) Faucet: Older style, two separate handles. Often has separate cartridges or washers for hot and cold. If your kitchen’s older than 2010, this is likely yours.
- Pull-Out Spray Faucet: The fancy one where you pull the head to spray. Popular in modern kitchens (think Bristol or London renovations). These have extra hoses and springs—mess with them, and you might end up with a sink that sprays water like a fire hose.
- Touchless/Sensor Faucet: The “futuristic” type that turns on with a wave. Rare in UK homes (only ~8% of households, per Which?), but if you’ve got one, do NOT disassemble it yourself—these need a pro.
- Wall-Mounted Faucet: Less common in kitchens but sometimes seen in high-end builds. These are a nightmare to remove because the pipes are hidden in the wall. If that’s yours, call a plumber now.
Pro Tip: If you’re unsure, take a photo of your faucet (focus on the base and handles) and Google “[Brand] [Model] faucet diagram.” Most manufacturers (like Aqualisa or Hansgrohe) have exploded-view diagrams online. Spend 5 minutes now to save 2 hours of frustration later.
What You’ll Need (No, You Don’t Need a Full Toolbox): Here’s the real list—no fluff, no “just in case” items. If you don’t have these, get them before you start:
- Adjustable wrench (10-12”) – For the nuts under the sink. A basin wrench (£15-£20 on Amazon or B&Q) is ideal but not mandatory.
- Flathead and Phillips screwdrivers – Most faucets have 4-6 screws holding the handle or spout. A magnetic screwdriver (£8 on eBay) saves you from dropping tiny screws into the sink.
- Plumber’s grease or WD-40 – If anything’s stuck (and it will be), this is your best friend. WD-40 is a lubricant, not a magic spray—use it right.
- Bucket and towels – You will have water dripping. Have a bucket ready to catch it.
- Pipe wrench (optional, for stubborn nuts) – Only if the basin wrench won’t budge. Use sparingly—these can scratch pipes.
- Teflon tape – For rethreading pipes later. £3 at any DIY store—don’t skip this.
Tools You Don’t Need (Save Your Money):
- Hacksaw – Unless you’re cutting pipes (which you’re not), this is overkill.
- Pipe cutter – Same as above. If you’re replacing the faucet, you’re not touching the pipes.
- Drain snake – Unless your sink is also clogged (in which case, fix that first).
- Expensive “faucet removal kit” – Scam. A wrench and screwdriver do the job.
Legal Note for UK Renters: If you’re renting, check your tenancy agreement before touching anything. Some landlords require you to get permission (or even hire a plumber) for repairs. Violating this could mean losing your deposit. If in doubt, send a photo of the leak to your landlord with a message: “This is a health hazard. Can I fix it or do you want to arrange a plumber?” Cover your arse.
How to Tell If Your Faucet Is Beyond DIY
Some faucets are better left to the pros. Here’s when to call a plumber instead of DIYing:
- The faucet is wall-mounted – Pipes are hidden. Messing with this risks flooding your kitchen or damaging the wall.
- You see rust or corrosion on the pipes – If the pipes under the sink look like they’re from the Victorian era, do not force them. Corroded pipes can burst when disturbed.
- The faucet is part of a larger system (e.g., filtered water, ice maker line) – Some high-end setups (common in London or Surrey kitchens) have extra connections. One wrong move, and you’re looking at £500+ in damages.
- You’re not comfortable shutting off the water – If the thought of turning off the mains makes you nervous, don’t do it. A plumber charges £80-£120 for a call-out—cheaper than a flooded kitchen.
Quick Cost Check (UK, April 2026):
| Service | DIY Cost | Plumber Cost |
|---|---|---|
| Faucet removal + replacement | £30-£80 (faucet + tools) | £150-£300 (labour + parts) |
| Cartridge replacement (leak fix) | £10-£40 (cartridge + WD-40) | £100-£200 (call-out + parts) |
| Emergency flood repair | £0 (but your landlord will bill you) | £200-£600+ (depending on damage) |
Step 2: Shut Off the Water and Clear the Deck
Rule #1 of DIY plumbing: Never, ever skip shutting off the water. I don’t care if you “just want to see how it’s attached.” One wrong move, and you’re hosing down your kitchen. Here’s how to do it right:
How to Find and Turn Off the Water Supply
Most UK kitchens have two water shutoff valves—one for hot, one for cold—located:
- Under the sink (most common). Look for two small knobs or levers (usually left = cold, right = hot). If they’re rusted shut, WD-40 + a wrench might free them.
- Under the kitchen floor (older homes). There might be a main stopcock (big valve) near the wall. If you can’t find it, check the meter cupboard (usually near the front of the house).
- Outside the house (if you’ve got an external stopcock). This is your last resort—turn it clockwise until it stops.
- Turn off the mains water (stopcock outside or under the floor).
- Drain the pipes by turning on the tap until water stops flowing.
- Call a plumber to replace the valves. £50-£100—cheaper than a flood.
- Cover the drain with a sink strainer (£5 at B&Q) or a clean rag.
- Lay out a towel under the sink. Drops happen—catch them before they roll away.
- Take photos of the faucet before disassembling. Label parts with masking tape if needed. You’ll thank me later.
- Have a magnetic wand (£10 on Amazon) ready. Dropped a screw? Swipe the wand over the drain—it’ll pull it out.
What If the Valves Won’t Turn? If the shutoff valves are stuck, don’t force them. You’ll strip the valve or break the pipe. Instead:
Pro Move: Test the Shutoff After turning the valves off, turn on the faucet. If water still comes out, you didn’t shut it off properly. Keep trying until it’s bone-dry. No water = no disasters.
Clear the Area (Because You Will Drop Something)
Your kitchen sink is a death trap for small parts. Screws, washers, and cartridges have a 60% chance of ending up in the drain if you’re not careful. Prevent this:
Time Check: Shutting off water + prepping = 10-15 minutes. If it’s taking longer, you’re doing it wrong.
Step 3: Remove the Faucet (The 3 Most Frustrating Scenarios—And How to Beat Them)
This is where most people screw up. The faucet looks simple, but hidden nuts, corroded threads, and stubborn parts turn a 20-minute job into a 2-hour headache. Here’s how to avoid the top 3 pain points:
Scenario #1: “The Handle Won’t Come Off—It’s Glued Shut!”
Problem: You unscrew the decorative cap (usually a small metal or plastic button under the handle), but the handle itself won’t budge. It’s either:
- Stuck due to limescale (common in hard water areas like Birmingham or Manchester).
- Held by a hidden screw (some handles have a Phillips screw under the cap—you missed it).
- Corroded from years of moisture (if the screw holes are rusted, you’re in trouble).
Solution:
- Spray WD-40 or plumber’s grease into the screw holes. Let it sit for 5-10 minutes.
- Try the screwdriver again. If it still won’t budge, tap the handle gently with a rubber mallet (£8 at Toolstation) to loosen it.
- If the screw is stripped:
- Drill it out with a small metal drill bit (£5 at B&Q). Go slow—don’t crack the handle.
- Use a screw extractor (£10 on Amazon) if the hole is ruined.
- Last resort: Cut the handle off.
- Use a hacksaw to cut through the base of the handle (where it meets the spout).
- This is ugly, but it works. You’ll need to replace the entire faucet after.
Reality Check: 20% of faucet removals fail at the handle stage. If yours is stuck, don’t panic—just follow the steps. If you’re spending more than 30 minutes on this, call a plumber.
Scenario #2: “The Nut Under the Sink Won’t Loosen—It’s Like It’s Welded On!”
Problem: You’ve got the wrench on the large nut under the sink, but it’s not moving. This happens because:
- Limescale has sealed it shut (UK hard water is brutal—60% of households deal with this).
- The nut is cross-threaded (someone before you forced it, and now it’s stuck).
- The pipe is corroded (common in older homes).
Solution:
- Spray WD-40 or penetrating oil around the nut. Let it sit for 15-20 minutes.
- Try the wrench again.
- If it’s loose but stuck: Tap the wrench gently with a hammer to break the seal.
- If it’s completely seized: Use a basin wrench (better grip) or a pipe wrench (last resort).
- If the nut won’t budge:
- Heat it up with a propane torch (£20 at Halfords). Heat the nut for 30 seconds—this expands the metal and can loosen it. Warning: Don’t burn the pipes or your hands.
- Cut the nut off with a hacksaw if it’s completely seized. You’ll need to replace the nut and possibly the pipe fitting later.
- If the pipe is corroded:
- Do NOT force it. You’ll crack the pipe and cause a leak.
- Call a plumber. Corroded pipes need a pro—£150-£300 to replace, but worth it.
Time Warning: Spending over 45 minutes on a stuck nut? Stop. You’re risking stripping the pipe or breaking the fitting. At this point, a plumber is cheaper than your time + potential damage.
Scenario #3: “The Faucet Won’t Come Off—It’s Stuck to the Sink!”
Problem: You’ve removed the handle, loosened the nut, but the faucet body won’t lift off the sink. This usually means:
- The mounting nuts under the sink are still tight (you missed them).
- The faucet is sealed with silicone or plumber’s putty (common in older installs).
- The sink’s drain assembly is interfering (the faucet is caught on the drain pipe).
Solution:
- Check for hidden mounting nuts.
- Look under the sink for two small nuts holding the faucet to the sink deck. These are often hidden behind the spout or under rubber gaskets.
- Remove them with a wrench. If they’re rusted, WD-40 + heat (see above).
- Break the seal.
- If the faucet is stuck due to silicone, score around the base with a utility knife (carefully—don’t cut yourself).
- Gently rock the faucet side to side while pulling up. Don’t yank—you’ll crack the sink.
- If the drain is in the way:
- Remove the drain assembly (unscrew the large nut under the sink). This gives you better access to lift the faucet.
- If the faucet is still stuck, you may need to cut the supply lines (see next step).
- Last resort: Cut the supply lines.
- If the faucet is completely seized, you’ll need to cut the copper or plastic supply lines with a pipe cutter (£15 at Screwfix).
- Measure the new faucet’s supply lines before buying a replacement—mismatched lengths = leaks.
- Use a propane torch to heat the copper lines if they’re too tight to cut (but be careful—copper gets hot fast).
Reality Check: Cutting supply lines is a last resort. If you’re here, you’ve already spent 1+ hour on this. At this point, a plumber would’ve charged £120 and been done in 30 minutes. Weigh your time vs. cost.
Pro Tip for Reinstallation: If you’re replacing the faucet, here’s how to avoid the same headaches later:
- Use Teflon tape on all threads (hot and cold supply lines). No tape = leaks in 6-12 months.
- Don’t overtighten the nuts. Hand-tight + ½ turn with a wrench = perfect. Overtightening cracks pipes.
- Apply plumber’s grease to the mounting gasket. This prevents it from sticking to the sink.
- Label the hot and cold supply lines with tape before covering them up. Saves you from guessing next time.
- Single-handle faucets: 90% of leaks are cartridge failures. A new cartridge (£10-£30) + 20 minutes of work = fixed.
- Double-handle faucets: Check the washers (£5 for a pack). If they’re worn, replace them.
- Pull-out spray faucets: The hose or springs might be the issue. Replacing the hose (£15-£25) can save the faucet.
Step 4: What to Do With the Old Faucet (And How to Pick a Replacement)
Congrats—you’ve got the faucet off. Now what? Don’t just chuck it in the bin. Here’s what to do next:
Option 1: Fix the Old Faucet (If It’s Worth It)
Not all faucets are trash. If yours is less than 10 years old and the issue is just a worn cartridge or washer, fixing it might be cheaper than replacing. How to tell:
When to Replace Instead of Fix:
- The faucet is older than 15 years. Modern faucets are more efficient (water-saving) and durable.
- The finish is scratched or discoloured. A new faucet boosts your kitchen’s resale value (£1,000-£3,000 for a UK home, per Rightmove).
- You hate the design. If it’s ugly or outdated, replacing it is a quick home improvement win.
- The pipes are corroded. If the supply lines are rusty or brittle, replace them while you’re at it.
Option 2: Pick a Replacement Faucet (UK Buying Guide)
Not all faucets are created equal. Here’s how to avoid buyer’s remorse and pick one that’ll last:
Step 1: Measure Your Sink
- Deck thickness: Measure from the top of the sink to the bottom. Most UK sinks are 25-30mm thick. If yours is thicker, you’ll need an extended faucet.
- Spout reach: Measure from the center of the faucet to the back of the sink. Standard is 200-250mm. If your sink is deep, go for 300mm+ reach.
- Hole size: Most faucets fit a 35mm hole, but check yours. If it’s larger, you’ll need a deck plate (£5-£10).
Step 2: Choose a Type (Based on Your Needs)
| Faucet Type | Pros | Cons | Best For | Price Range (UK) |
|---|---|---|---|---|
| Single-Handle (Mixer) | Easy to use, modern look, better water control | Cartridges wear out (£20-£50 to replace) | Most UK kitchens, families, small spaces | £50-£300 |
| Double-Handle | Durable, classic look, easy to repair | Less precise water temp control | Traditional kitchens, older homes | £40-£250 |
| Pull-Out Spray | Versatile, great for cleaning, modern | Hoses can wear out (£30-£60 to replace) | Busy kitchens, families, large sinks | £80-£400 |
| Touchless/Sensor | Hygienic, futuristic, water-saving | Battery-dependent, expensive to repair | High-end kitchens, commercial setups | £200-£600 |
Step 3: Check the Finish (Because It Matters)
- Stainless Steel: Durable, easy to clean, but shows water spots. (£60-£200)
- Brushed Chrome: Classic, but fingerprints show easily. (£50-£250)
- Matte Black: Trendy, hides marks, but can look dated fast. (£80-£300)
- Oil-Rubbed Bronze: Luxe look, but requires polishing. (£100-£400)
- White/Alabaster: Great for modern kitchens, but stains easily. (£70-£250)
Step 4: Water Efficiency (Because Your Bill Matters)
- Look for the WELS rating (Water Efficiency Labelling Scheme). 4-6 stars = best.
- Avoid single-function faucets (e.g., only spray). Mixer or pull-out sprays save water long-term.
- Aerators are your friend. A £5 aerator can reduce flow by 30% without sacrificing pressure.
Where to Buy in the UK (And What to Avoid)
- Best for Quality:
- Mira (UK-based, great warranties)
- Grohe (German engineering, lasts 10+ years)
- Hansgrohe (Premium, but pricey)
- Best for Budget:
- Aqualisa (Good mid-range, £50-£150)
- Bristan (Reliable, £40-£200)
- Amazon Basics (Cheap, but avoid for long-term use—£30-£80)
- Avoid:
- No-name brands on eBay/Amazon. 60% of these leak within a year.
- Faucets without warranties. A good brand offers 2-5 years.
- Super cheap “decorative” faucets. They look nice but fail fast.
Pro Tip for Installation: If you’re replacing the faucet, here’s the order to do it in:
- Turn off the water. (You know the drill by now.)
- Attach the new supply lines to the faucet (hand-tighten + ½ turn with wrench).
- Feed the supply lines through the sink hole.
- Place the faucet on the sink and hand-tighten the mounting nuts under the sink.
- Tighten the nuts fully (but don’t overtighten—you’ll crack the sink).
- Attach the handle/spout (follow the manufacturer’s instructions—this is where most people mess up).
- Turn the water back on and check for leaks. If it leaks, tighten the nuts slightly (usually the issue).
Step 5: Common Mistakes (And How to Avoid Them)
You’re almost done—but don’t screw it up now. Here are the top 5 mistakes people make after removing a faucet (and how to avoid them):
Mistake #1: Not Testing for Leaks Before Walking Away
Problem: You reinstall the faucet, turn the water back on, and walk away—only to find a puddle under the sink an hour later.
Solution:
- Turn the water back on slowly. Let it run for 2-3 minutes to flush out air.
- Check under the sink for drips. If you see even a single drop per minute, something’s wrong.
- Tighten the nuts slightly (¼ turn at a time). Overtightening cracks pipes—go slow.
- If it’s still leaking:
- Check the cartridge/seals (if it’s a single-handle faucet).
- Reapply Teflon tape to the supply lines.
- Call a plumber if it’s still leaking after 30 minutes of troubleshooting.
Mistake #2: Forgetting to Reuse the Old Supply Lines
Problem: You buy a new faucet, but the supply lines are the wrong length. Now you’re stuck with a faucet that doesn’t fit.
Solution:
- Measure your old supply lines before buying a new faucet. Write it down.
- If the new faucet’s lines are shorter:
- Buy an extension kit (£10-£20 at B&Q).
- Or cut and rethread the old lines (if they’re copper—requires a propane torch).
- If the new faucet’s lines are longer:
- Coil the extra length and secure it with a zip tie so it doesn’t dangle.
- Or cut them down (if they’re plastic—use a hacksaw).
Mistake #3: Skipping the Teflon Tape (And Regretting It)
Problem: You forget to wrap Teflon tape around the threads of the supply lines. Result? A slow leak that turns into a flood in a week.
Solution:
- Always use Teflon tape on both hot and cold supply lines.
- Wrap it clockwise (same direction as the threads). 2-3 wraps = enough.
- If you’re unsure, use pipe joint compound (£5 at Screwfix) as a backup sealant.
Mistake #4: Not Labeling the Hot and Cold Lines
Problem: You reinstall the faucet, turn the water on, and suddenly the hot water is coming out of the cold side. Now you’ve got to drain the pipes and swap the lines.
Solution:
- Before covering up the pipes, label them with red (hot) and blue (cold) tape.
- Take a photo of the setup before hiding the pipes behind the cabinet.
- If you mess up:
- Turn off the water.
- Drain the pipes by turning on the tap.
- Swap the lines and retest.
Mistake #5: Not Checking the Drain Assembly
Problem: You remove the faucet, but the drain is clogged or leaking—and you didn’t notice until water starts backing up when you use the sink.
Solution:
- While the faucet is off, check the drain:
- Remove the drain assembly (unscrew the large nut under the sink).
- Clean out any gunk (hair, food, soap scum).
- Check the rubber gasket—if it’s cracked, replace it (£3 at B&Q).
- If the drain is slow:
- Use a drain snake (£10) to clear the pipe.
- Pour boiling water + baking soda (natural cleaner).
Final Reality Check: If you’ve made any of these mistakes, don’t panic. Most can be fixed in under 30 minutes if you catch them early. The only “unfixable” mistake? Walking away from a leak and letting it cause water damage. Check for leaks every 10 minutes for the first hour.
You did it. The faucet’s off, the new one’s in (or the old one’s fixed), and your kitchen sink is finally working like it should. No more dripping noises at 3 AM, no more wasting water, and no more staring at a faucet like it’s your personal enemy.
Here’s what you’ve saved (and what you’ve gained):
- Money: £100-£200 vs. a plumber’s call-out. That’s enough for a nice takeaway or a new kitchen gadget.
- Time: No more waiting for a plumber (average wait in the UK is 3-5 days for non-emergencies).
- Stress: No more listening to that damn drip. Science says repetitive sounds like dripping water trigger anxiety—now you can sleep in peace.
- Home Value: A modern, leak-free faucet can boost your kitchen’s appeal by £1K-£3K if you’re selling (per Rightmove).
But here’s the real win: You didn’t just fix a faucet—you proved to yourself that you can tackle home repairs. That’s a skill that’ll save you thousands over the years. Next up? Maybe the shower head that sprays like a garden hose or the toilet that flushes like a whisper.
Now, before you put your tools away, here’s what to do next:
- Test the faucet under pressure. Run it at full blast for 2 minutes. If it holds, you’re golden.
- Clean up the mess. Limescale, old gasket gunk, and dust are everywhere. A quick wipe-down with vinegar keeps things fresh.
- Take a photo of the new setup. Label the hot/cold lines (trust me, future you will thank present you).
- Celebrate. You earned it. Crack open a beer, put on some music, and enjoy your handiwork.
Still stuck? If the faucet’s still leaking, the new one doesn’t fit, or you’ve spent over 2 hours and it’s not working, call a plumber. There’s no shame in it—even the best DIYers know when to tap out. But if you’ve followed this guide, you’re 90% of the way there.
Now go enjoy your leak-free sink—and tell your mates you did it yourself. (They’ll be impressed. Or jealous. Either works.)
Need more DIY tips? Check out these next:
- [How to Unclog a UK Drain Without Calling a Plumber] (Because drains clog. Always.)
- [The Ultimate Guide to UK Kitchen Renos (Without Overspending)] (Now that your sink’s fixed, maybe it’s time for a full upgrade.)
- [How to Fix a Running Toilet in 10 Minutes] (Because toilets are the next frontier.)
Got a question? Drop it in the comments. I reply to every single one. (Yes, even the weird ones like “Why does my tap water taste like metal?”)
How do I dismantle a kitchen sink faucet?
To dismantle a kitchen sink faucet, first, turn off the water supply. Then, use a wrench to loosen the nuts holding the faucet in place. Finally, gently pull the faucet out from the sink. It’s a straightforward DIY project that can save you a fair bit of cash on plumber fees.
What tools do I need to take apart a kitchen sink faucet?
You’ll need a basin wrench, adjustable pliers, and possibly a screwdriver. These tools make it easier to reach tight spots and loosen stubborn nuts. Having the right gear is crucial for a smooth home improvement task, especially if you want to avoid unnecessary hassle.
What should I do if my kitchen sink faucet won’t come off?
If your kitchen sink faucet won’t budge, check for hidden screws or rust. Applying some penetrating oil can help loosen it. Be patient and give it a bit of time; sometimes, a stubborn faucet just needs a little encouragement to come off.
Can I replace my kitchen sink faucet myself?
Yes, you can replace your kitchen sink faucet yourself! It’s a common DIY project. With some basic tools and a bit of guidance, you can install a new faucet and give your kitchen a fresh look without hiring a pro.
How often should I replace my kitchen sink faucet?
You should consider replacing your kitchen sink faucet every 5 to 10 years, depending on wear and tear. If you notice leaks or poor performance, it might be time for an upgrade. Keeping your kitchen ideas fresh can make a big difference in your home.
What are some common issues with kitchen sink faucets?
Common issues include leaks, low water pressure, and difficulty in turning the handle. These problems can arise from wear and tear or mineral buildup. Addressing them early can prevent bigger issues down the line and keep your kitchen running smoothly.