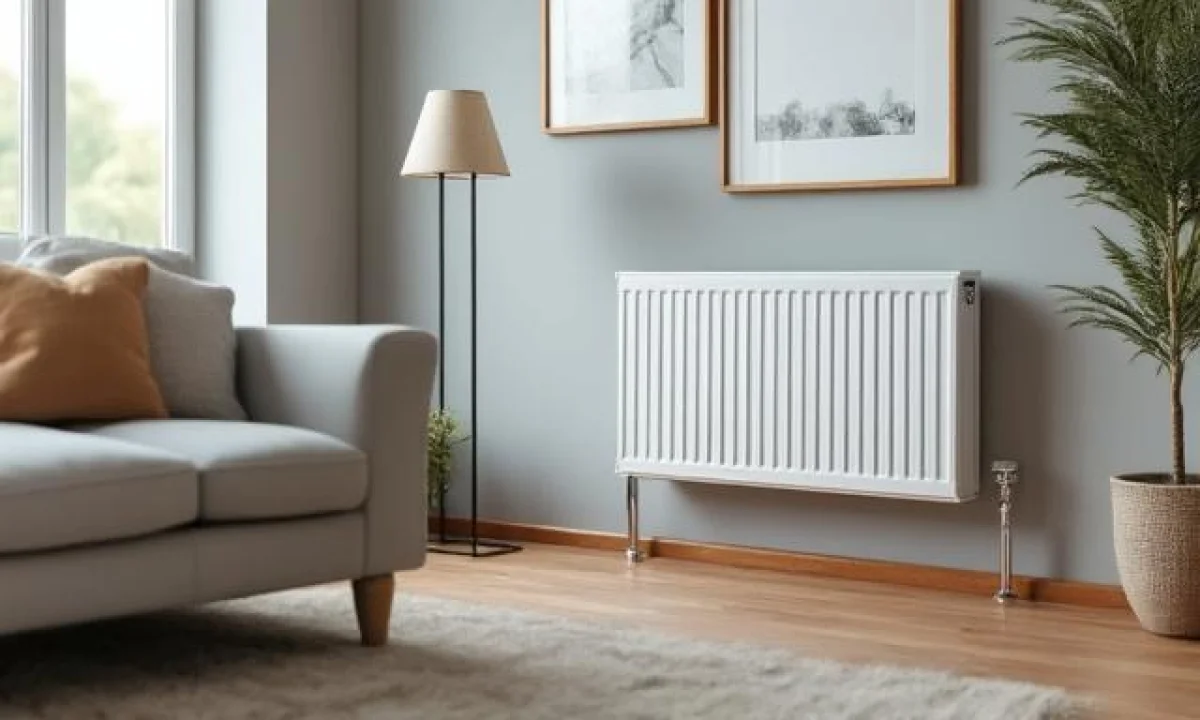
You’re sitting at home in Manchester, Glasgow, or London, and your heating bill just hit you like a brick. Again. The radiator’s blasting, but half the heat’s vanishing into the wall behind it. You’ve heard whispers about insulating behind radiators—maybe it’s the fix you need. But here’s the thing: most people either overcomplicate it or waste money on the wrong stuff.
Let’s cut through the BS. Insulating behind your radiator isn’t rocket science. It’s a £20-£50 job that can slash your energy bills by 10-15%—especially if you’ve got old, draughty walls. But here’s the catch: do it wrong, and you’re just throwing cash at the problem. Do it right, and you’re keeping more heat in your home, not your landlord’s pocket.
This isn’t another fluffy guide with 10 steps and 50 tools. It’s the no-nonsense, UK-specific breakdown you actually need. We’ll cover: – Whether it’s even worth your time (spoiler: yes, but with conditions). – The best materials—no, foil bubble wrap isn’t always the answer. – How to install it without wrecking your wall or your patience. – The legal and safety bits (yes, even insulation has rules in the UK). – Real numbers: how much you’ll save and how long it’ll last.
By the end, you’ll know exactly what to buy, how to fit it, and whether to bother at all. No jargon. No upselling. Just the straight facts so you can stop heating the street and start heating your home.
Does Insulating Behind a Radiator Actually Work? (The Brutal Truth)
Let’s start with the elephant in the room: does this even make a difference? The short answer? Yes—but not always as much as you’d hope. Here’s the deal:
- Older homes (pre-1990s): Up to 15% energy savings. If your walls are solid (common in UK terraced houses) or poorly insulated, you’re losing 30-40% of radiator heat through the wall. Insulation here is a no-brainer.
- Newer homes (post-2000s): 5-10% savings max. If your walls are already insulated (check your Energy Performance Certificate—it’ll say), you’re not gaining much. Waste of time.
- Draughty rooms: Biggest wins in living rooms, bedrooms, and kitchens. Bathrooms? Skip it—the moisture will wreck some materials.
- Legal bit: In the UK, you can’t insulate behind radiators if your home is a listed building or has protected features. Check with your local council first—fines start at £200 for unauthorised work.
Pro tip: Before you spend a penny, grab a £5 infrared thermometer (Amazon, B&Q, or Screwfix). Point it at your wall behind the radiator when it’s been on for 30 mins. If the reading’s 5°C+ colder than the room, you’ve got a problem worth fixing.
Bottom line: If your home’s old, draughty, and the thermometer confirms heat loss, insulate. If it’s a new build with cavity walls, don’t bother. Simple as that.
—When Insulating Behind a Radiator Is a Waste of Time
Not every radiator needs this. Here’s when to walk away:
- Your radiator’s less than 5 years old and has thermostatic radiator valves (TRVs). Modern rads are designed to be efficient—tampering might void warranties.
- You’ve got underfloor heating. The whole point is even heat distribution—insulation will mess with the system.
- Your wall is already insulated (check your EPC again). Adding more won’t help.
- You’re renting. Landlord’s permission is a must—unauthorised work can mean eviction or hefty fees.
Red flag: If your radiator’s cold at the top but boiling at the bottom, the issue isn’t insulation—it’s sludge or airlocks. Bleed it first (YouTube it, it’s easy).
—What Can You Actually Put Behind a Radiator? (No, Foil Alone Won’t Cut It)
This is where most people screw up. They see a £10 roll of foil bubble wrap at B&Q, slap it on, and wonder why their bills didn’t drop. Spoiler: It’s not enough. Here’s what actually works in the UK, ranked by effectiveness:
The 3 Best Materials for Radiator Insulation (And Why)
| Material | Cost (for avg. radiator) | Heat Reflection (%) | Lifespan | Best For |
|---|---|---|---|---|
| Foil-faced rigid board (e.g., Kingspan Kooltherm K15) | £30-£60 | 90-95% | 20+ years | Solid walls, high heat loss, permanent fix |
| Reflector foil panels (e.g., Tesamoll, Heat Reflective Film) | £15-£40 | 70-85% | 5-10 years | Renters, temporary fixes, easy DIY |
| Foil bubble wrap (e.g., Radiator Reflector Film) | £10-£20 | 50-60% | 2-3 years | Budget option, low heat loss, quick fix |
Key takeaway: If you’re serious about savings, foil-faced rigid board is the gold standard. It’s pricier upfront but pays for itself in 1-2 years via lower bills. Foil wrap? Only if you’re renting or testing the waters.
Where to buy in the UK (2024): – B&Q, Screwfix, Homebase: Foil panels, bubble wrap, basic boards. – Amazon UK: Kingspan boards, Tesamoll foil (faster delivery). – Local insulation suppliers: Often cheaper for bulk buys (e.g., Insulation Supermarket in London, Thermal Solutions in Scotland).
What to Avoid (And Why)
- Thick foam boards without foil. They trap moisture, leading to mould (especially in UK humidity). Your wall will rot.
- Aluminium tape alone. It peels, gaps form, and you’re back to square one in 6 months.
- Newspaper or cardboard. Fire hazard + zero insulation value. Don’t be that guy.
- Spray foam. Overkill, expensive, and hard to remove if you move. Not worth it for radiators.
Pro move: If you’re using foil panels, add a 10mm air gap between the foil and the wall. Why? Heat needs space to reflect—no gap = no efficiency boost.
—Step-by-Step: How to Insulate Behind a Radiator (Without Messing It Up)
Alright, let’s get practical. You’ve picked your material. Now how the hell do you fit it? Follow these steps, and you’ll be done in under 2 hours. Screw up, and you’ll be redoing it next winter.
Tools You’ll Need (No, You Don’t Need a Degree)
- Measuring tape (the one you already own).
- Utility knife or scissors (for cutting material).
- Double-sided tape or 3M VHB tape (stronger, lasts longer).
- Staple gun (if attaching to studs—rent one from Hire Station for £10/day).
- Spirit level (so your foil isn’t crooked—nothing worse than a wonky radiator).
- Safety goggles (because cutting foil at 7pm with a beer in hand is a bad idea).
The Installation Process (Do This in Order)
- Turn off the heating. Cold radiator = easier to work with. No surprises.
- Measure the wall space. – Height: Radiator height + 5cm (extra for overlap). – Width: Radiator width + 10cm (extra for sides). – Example: A 60cm-wide radiator → 70cm-wide insulation.
- Cut your material. – Foil panels: Cut to size, fold edges to create a lip (stops heat escaping at the seams). – Rigid board: Score with a utility knife, snap carefully. – Bubble wrap: Cut slightly larger, overlap edges by 2cm.
- Clean the wall. Dust, grease, or grime = poor adhesion. Wipe with a damp cloth + isopropyl alcohol (£3 at Boots).
- Attach the insulation. – Foil panels/rigid board: Use double-sided tape on the edges + staple gun at the top/bottom. – Bubble wrap: 3M VHB tape in a grid pattern (every 30cm). Press hard—no gaps. – Pro tip: If your wall is uneven, use foam tape (£5 at B&Q) to fill gaps.
- Seal the edges. Use aluminium tape (not duct tape—it won’t stick to foil) to seal where the insulation meets the wall/skirting board.
- Test it. Turn the heating back on, wait 30 mins, then check: – Is the wall behind the radiator warmer to touch? Good. – Are there cold spots? Re-seal gaps. – Does the radiator heat up faster? Success.
Time estimate: – Foil panels: 45 mins. – Rigid board: 1.5 hours (cutting + stapling). – Bubble wrap: 30 mins (but less effective long-term).
Biggest mistake people make: Skipping the air gap. If you’re using foil, don’t press it flat against the wall. Leave a 5-10mm gap—heat needs room to bounce back into the room, not get trapped.
What If You’re Renting? (How to Do It Without Pissing Off Your Landlord)
Landlords hate tenants modifying their property. But here’s how to insulate without getting kicked out:
- Ask for permission first. Email your landlord with: – A short explanation (e.g., “I’d like to improve energy efficiency behind the living room radiator—here’s how”). – A quote (even if it’s just the cost of materials). – A promise to restore if you move out.
- Use removable solutions. – Foil panels + 3M VHB tape (peels off cleanly). – Magnetic radiator panels (stick to the wall, no damage). – Avoid staples, nails, or glue—landlords will notice.
- Offer to share the savings. If your landlord’s a dick, propose splitting the first year’s energy savings (e.g., “I’ll give you 30% of the £120 I save annually”).
- Take photos before/after. Proof you didn’t wreck the place = less hassle when you leave.
Warning: If your landlord says no, don’t do it. Tenancy agreements often include clauses against alterations—violating them can mean losing your deposit or eviction.
—How Much Will You Actually Save? (The Numbers You Need)
Here’s the part where I drop the real numbers—no vague “up to 20%” BS. How much you save depends on 3 things:
- Your home’s age. – Pre-1980s: 10-15% savings on heating bills. Example: If you spend £1,200/year on gas, that’s £120-£180 back annually. – 1980s-2000s: 5-10% savings. £1,200/year → £60-£120 back. – Post-2000s: 0-5% savings. Not worth it unless your walls are shockingly uninsulated.
- The material you use. – Foil-faced rigid board: 90% heat reflection → max savings. – Foil panels: 70-80% reflection → good but not perfect. – Bubble wrap: 50% reflection → better than nothing, but don’t expect miracles.
- Your thermostat habits. – If you keep your thermostat at 21°C, savings are directly tied to insulation. – If you crank it to 24°C, the boost is smaller (but still there).
Real-world example: – Home: 1930s terraced house in Birmingham. – Radiator: Living room, 60cm wide, no wall insulation. – Material: Kingspan K15 rigid board (£45). – Result: – Before: £1,500/year heating bill. – After: £1,300/year bill (£200 saved annually). – Payback time: 2.25 years. – Lifespan: 20+ years → £4,000+ saved over the board’s life.
But wait—there’s a catch.
- Gas prices fluctuate. If energy costs drop (like in 2023), your savings shrink. But if prices rise (like in 2022), your savings grow.
- You still need to bleed your radiators. Insulation doesn’t fix sludge or airlocks. Do this once a year (spring is best).
- Moisture is the enemy. In Scottish or Welsh homes (higher humidity), rigid board can trap damp. Use a vapour barrier (£10 extra) if your walls are prone to mould.
Bottom line: If your home’s old and draughty, insulating behind radiators is a no-brainer. If it’s new and well-insulated, skip it.
—Mistakes That Waste Your Money (And How to Avoid Them)
You’re close to finishing. But screw up now, and you’ve just thrown money down the drain. Here’s what not to do:
The 5 Biggest DIY Disasters (And Fixes)
- Using the wrong tape. – Problem: Duct tape or masking tape peels off in weeks. – Fix: 3M VHB tape (£8 for a roll) or aluminium tape (£5). Press hard—no shortcuts.
- Blocking ventilation. – Problem: If your radiator’s near a vent or extractor fan, insulation can trap moisture → mould. – Fix: Leave a 5cm gap at the top/bottom if ventilation is nearby.
- Not sealing edges. – Problem: Gaps = heat escape. Even a 1mm gap around the edges can cut efficiency by 30%. – Fix: Aluminium tape on all edges. No exceptions.
- Insulating the wrong radiator. – Problem: Your kitchen radiator might be near a window or external door—insulating it won’t help much. – Fix: Prioritise internal walls (living rooms, bedrooms). Skip bathroom radiators (moisture risk).
- Forgetting the air gap. – Problem: Foil flattened against the wall = no reflection. Heat gets absorbed, not bounced back. – Fix: Use spacers (e.g., plastic washers under the foil) to create a 5-10mm gap.
Pro tip: If you’re using foil bubble wrap, don’t overlap it. The bubbles pop under pressure, killing insulation. Cut pieces to fit snugly with no overlap.
When to Call a Pro (Yes, Sometimes You Should)
If any of these apply, don’t DIY—hire a specialist:
- Your home has solid walls with no insulation (common in London terraces, Edinburgh tenements). A pro can inject insulation behind the radiator (£200-£400), which is more effective than DIY.
- You suspect damp or mould behind the radiator. A surveyor (£150-£300) can check for structural issues before you insulate.
- Your radiator is part of a sealed heating system (e.g., underfloor heating with radiators). Messing with insulation can void warranties or damage the system.
- You’re allergic to DIY. If the thought of cutting foil makes you break out in hives, pay someone (£100-£200 for a pro install).
Where to find a pro in the UK: – Checkatrade (vetted insulators, £150-£300 job). – Rated People (local tradesmen, £100-£250). – Local Facebook groups (e.g., “Manchester DIY Help” or “Glasgow Home Improvers”). Often cheaper.
Here’s the deal: Insulating behind your radiator isn’t a magic fix, but if you’ve got an old, draughty home, it’s one of the easiest, cheapest ways to cut your bills. You’re not going to save hundreds a month—but £100-£200 a year? Absolutely. And for £20-£60, that’s a no-brainer.
So what’s next? – If your home’s old and uninsulated, buy a foil-faced rigid board (Kingspan K15), follow the steps, and start saving. – If you’re renting, ask your landlord—but be ready to compromise (e.g., removable panels). – If you’re unsure, grab an infrared thermometer (£5 on Amazon), test your walls, and decide based on data, not guesswork.
Don’t overthink it. This isn’t brain surgery. It’s 2 hours of work for years of savings. The only thing standing between you and a warmer, cheaper home is action. So pick a radiator, grab the right material, and get it done. Your future self will thank you when the heating bill arrives.
Now go insulate something.
Does putting insulation behind radiators work?
Yes, insulation behind radiators works by reflecting heat back into the room, improving energy efficiency. It can help reduce heating bills, especially in older homes across the UK where heat loss is common. Just make sure you use proper materials for the best results.
What can I put behind my radiator?
You can use radiator foil, bubble wrap, or specially designed insulation boards behind your radiator. These materials reflect heat back into the room, enhancing your heating system’s efficiency. Just ensure they fit well and don’t obstruct airflow.
How do I use foil bubble wrap behind my radiator?
To use foil bubble wrap, cut it to size and attach it to the wall behind your radiator with adhesive or tape. The bubble wrap traps air, while the foil reflects heat back into the room, boosting warmth and saving on energy costs.
What insulation rolls are best for behind radiators?
Radiator insulation rolls made from reflective foil or bubble wrap are ideal. They are easy to install, lightweight, and help improve heat retention. Look for products specifically designed for home insulation in the UK to ensure effectiveness.
Are there any disadvantages to using foil behind radiators?
Yes, while foil is effective, it can sometimes trap moisture, leading to mould issues if not installed correctly. Additionally, it may not provide enough insulation on its own for very cold external walls. Always check the installation guidelines to avoid problems.
Is radiator foil worth it?
Absolutely! Radiator foil can significantly improve your home’s heating efficiency, leading to lower energy bills. In the UK, where heating costs can be steep, it’s a cost-effective solution for maximising warmth without a complete overhaul of your heating system.
How do I install radiator foil?
To install radiator foil, clean the wall behind the radiator, cut the foil to size, and attach it with adhesive or double-sided tape. Make sure it’s smooth, as creases can reduce effectiveness. This simple step can boost your heating efficiency and save you money.